A quick post to cover some of the technical issues associated the move to online teaching and marking.
Audio
I use an Audio-Technica 2020USB+ condenser microphone when at my desk.

In the class room, I previously have used a wireless microphone (with a USB receiver) when recording live content in rooms that I moved around a lot in.
Other audio options I have tried:
- headset microphone – not great, records breathing!
- microphone built into earphones, but dangling lower – better at not picking up breathing, but my one is a bit crackly.
- a simple lapel microphone with a direct line in and a long cable – a good, inexpensive option for those looking for something that won’t take up too much space.
Webcam
Using a webcam built into a laptop means that you will have a horrible angle in most situations – think of all the people you see being interviewed from home!
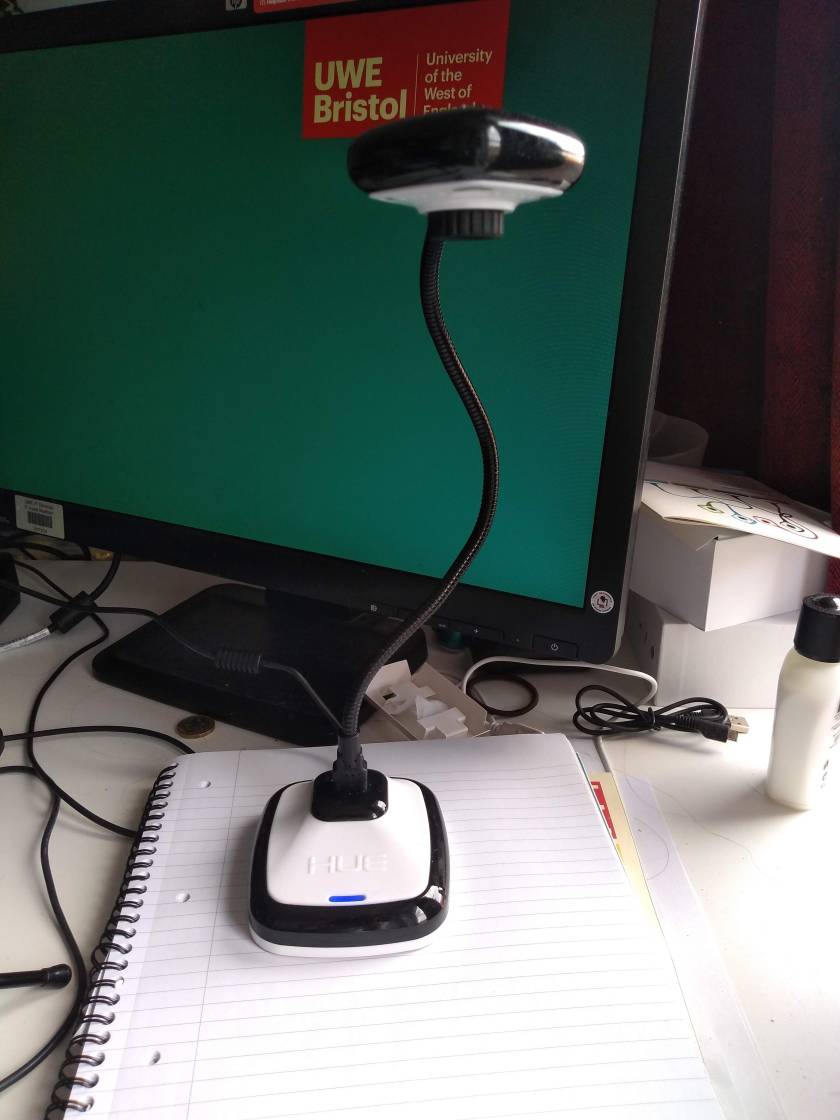
I have a seperate webcam that can be positioned to my eyeline. This webcam also has document camera software (it is the HUE HD Pro USB document camera) which means that I can also use it as a visualiser and share the application with students for live tutorials.
Lighting when using a webcam
I have my desk set up right beside patio doors, so I have excellent natural light. However, there are some things you should think about here:
Natural light is your best lighting friend, so use it where possible. The nearer you can be to a window, the better.
Try to set up your space so it has a neutral but light background, with minimal things in the background to avoid distracting the viewer.
Avoid having big really dark items as the webcam tries to expose for these and then messes up all the rest of the lighting (for example, my curtains need to be out of shot or else everything else is over exposed. This tip was given to me during a video chat with a videographer, so I was able to have personalised recommendations for fine tuning my space.)
Try to avoid overhead light – it can create shine and shadows.
Have a small source of soft light to one side [if you have frosted rather than clear light bulbs it is helpful, if you don’t you could try a layer of tracing paper to create a softer effect – but you will lose some light]. I have a free standing lamp that has both an uplight and a side light. The side light is height adjustable, so I position that to come at the side of my face.
Harsher lights can be directed from the back (back lighting).
Bounce lights off bright surfaces (perhaps even a sheet hung up) to avoid a glare from direct lights.
Marking / Annotating documents
I use a small Wacom device (CTH-480S-ENES) that I have had for years. Note that the photo below has it on an A4 pad for scale. The pen doesn’t have a battery and is very comfortable to use.
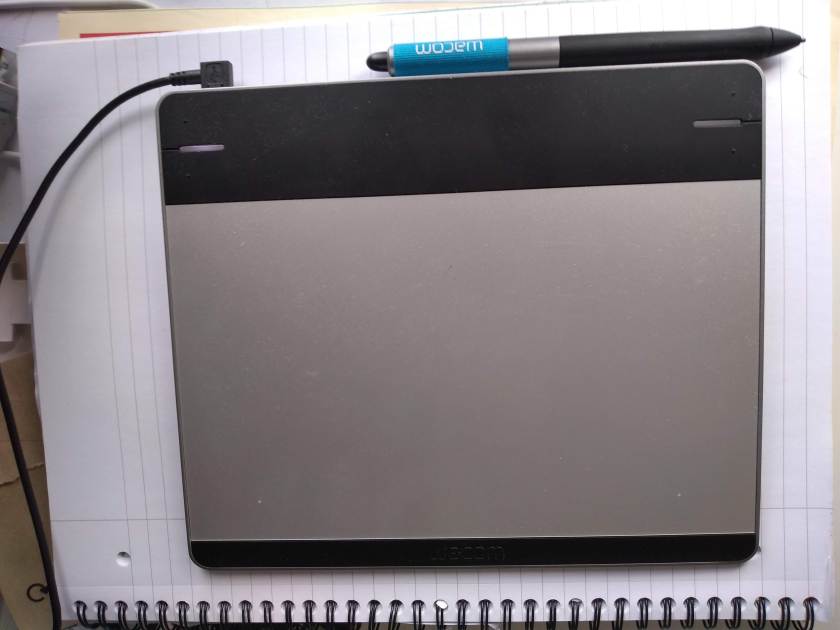
The important thing to remember for this one is that you need to configure the device so that the aspect ratio is appropriate or all of your writing will be distorted. A free solution for quick annotations is (surprisingly) the MS Edge browser. Using this for quick annotations does not massively increase the size of the documents.
